
How to Ace Flooring Installation: Step-by-Step Process and Expert Tips
Do you know what really impacts the overall look of your house or office? It’s the tidy and clean flooring that enhances the look of your space. Whether you want to add hardwood flooring or are looking for a practical vinyl one, the choice ultimately depends on the materials used and the flooring installation in Colorado Springs.
Flooring sets the tone for your entire interior, so you cannot mess that up. However, successful installation goes beyond just picking a flooring type—it requires preparation, planning, and execution. In this blog, we will be discussing the step-by-step process, sharing expert tips, and guiding you on how to ace flooring installation.
What You Will Learn
- Why Proper Flooring Installation is Important
- Step-by-Step Process of Flooring Installation
- Expert Tips to Master Flooring Installation
- Common Errors to Avoid
Why Proper Flooring Installation is Important
- Longevity: Correct installation guarantees your flooring endures decades without warping, cracking, or shifting.
- Aesthetic Value: Professionally installed floors are even, aligned, and aesthetically pleasing.
- Safety: Incorrect installation can result in uneven surfaces, thus posing more risks of trip and fall.
- Cost-Effectiveness: Installation errors can result in costly repairs in the future.
When done correctly, flooring installation can transform a room into a stylish, comfortable, and functional space.
Step-by-Step Process of Flooring Installation
1. Select the Proper Floor Material
Pick flooring that is right for your lifestyle, budget, and design style. The most common flooring options are:
- Hardwood: Classic and beautiful, but needs some sort of upkeep
- Laminate: inexpensive, durable, and has multiple designs
- Vinyl: It is not absorbed by moisture, making it an ideal kitchen and bathroom flooring option.
- Tile: The tile is trendy and durable, and fits the heavy-use zones perfectly.
- Carpet: Cozy and comfortable, great for bedrooms and living rooms.
Every material has its own installation demands, and the choice of which to use is the key to success. Your flooring installation contractor will look into and provide you with the best option.
2. Prepare the Subfloor
The subfloor needs to be clean, level, and dry. Preparation typically involves:
- Removing the old flooring and adhesives.
- Fixing cracks, dents, or uneven sections.
- Testing moisture levels is especially necessary for wood floors.
Pro Tip: A poorly prepared subfloor can destroy even the best flooring. Ask your flooring company in Colorado Springs to take the extra time to ensure it’s flat and stable.
3. Gather Tools and Materials
Based on the flooring material, typical tools are:
- Measuring tape
- Utility knife
- Adhesive or nails
- Wood or laminate spacers
- Level
- Trowel (for vinyl or tiles)
Preparation of all the above helps to prevent interruptions in the installation process.
4. Measure and Plan Layout
Measure the area and plan your floor layout. This avoids inconvenient cuts and uneven rows.
- For tiles, make straight rows with chalk lines.
- For wood or laminate, stagger the planks for a natural appearance.
- For carpet, measure the rolls accurately to prevent wastage.
Expert Tip: Begin in the center of the room for tiles and install outward to create a balanced pattern.
5. Acclimate the Flooring
The majority of flooring options, especially wood and laminate, take time to acclimate to the temperature and humidity in the room. To avoid future issues with wood expansion or contraction, your flooring installation in Colorado Springs requires a 48-72 hour wait time before the product is installed.
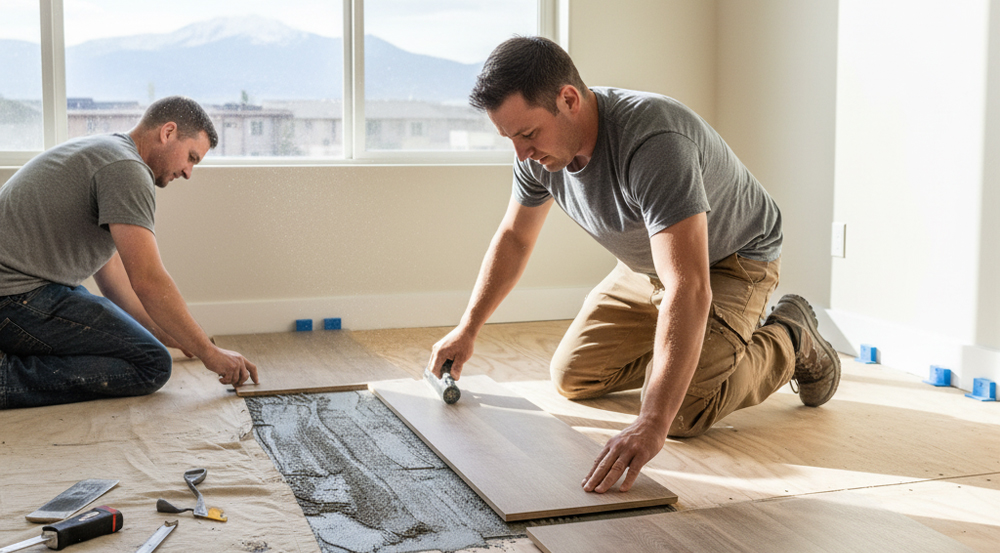
6. Install the Flooring
Hardwood or Laminate:
- Set the first row along the longest wall with spacers.
- Join planks with tongue-and-groove systems or adhesives.
- Stagger joints in successive rows for strength and appearance.
Vinyl:
- Apply adhesive uniformly with a trowel.
- Press sheets or planks tightly to prevent air bubbles.
- Trim excess on edges with a utility knife.
Tile:
- Spread thin-set mortar with a notched trowel.
- Set tiles carefully along chalk lines.
- Set spacers for uniform grout lines.
Carpet:
- Roll out the carpet and cut it slightly larger than the room.
- Stretch and fasten to tack strips.
- Trim edges cleanly against walls.
7. Finishing Touches
Once installed, finish the look with trim such as:
- Baseboards or molding to fill joints.
- Sealing and grouting tiles for longevity.
- Removing adhesive residues.
- Polishing or sealing hardwood floors.
8. Clean and Inspect
The last process is dust cleaning, adhesive, or grout cleaning. Test the floor to see whether it is rough, damaged, or has holes. Minute flaws can be repaired as needed before usage.
Pro Secrets to Learning How to Install Floors
The following are some of the tips that would make your flooring installation in Colorado Springs a success:
Always Order Extra Material
Purchase 5-10 percent more flooring than the required amount to include the errors, cuts, and repairs.
Check Lighting During Layout
Floors look different under natural and artificial light. Lay out a few rows beforehand to ensure it matches your vision.
Mind Expansion Gaps
Wood and laminate expand and contract. Leave small gaps along the edges to prevent buckling.
Use Quality Underlayment
Underlayment improves insulation, reduces noise, and adds comfort underfoot.
Don’t Rush Drying Times
Whether tile adhesive or grout, let it dry thoroughly before walking on the floor.
Common Errors to Avoid
Ignoring Subfloor Preparation: Warped or cracked floors result from uneven subfloors.
- Incorrect Measurement: Incorrect calculations will waste materials and time.
- Poor Planning: Failure to stagger planks or align tiles can destroy the end appearance.
- Utilizing Wrong Adhesives: Always use the correct type for your flooring material.
- Overlooking Manufacturer Instructions: Every flooring material requires special conditions—don’t overlook the booklet.
Caring for Your New Floors
After the install, it’s important to keep the floors looking fresh:
- Sweep and Vacuum Constantly: Prevents dust and dirt from building up, creating a worn-out surface.
- Put Down Rugs and Mats: Spend more time vacuuming in the high-traffic areas.
- Avoid Excess Water: Especially if it is wood or laminate.
- Reseal and Refinish: Periodically resealing hardwood and possibly tile helps maintain their shine and hardness.
Final Thoughts
Yes, flooring installation in Colorado Springs can feel overwhelming, but with proper planning and the right team, the process becomes smooth and stress-free. At Rev’d Up Renovations, we are known for delivering quality flooring and renovation services that not only enhance the look of your home but also stand the test of time.
Our skilled team handles every material with precision, ensuring your home is more than just a living space—it becomes a true retreat for comfort and relaxation. From roofing services and flooring to kitchen, bathroom, basement, and deck remodeling, we provide complete home renovation solutions under one roof.
So, why wait? Schedule an appointment with Rev’d Up Renovations today, get a consultation, and let’s turn your dream home into reality.
Call us at 719-439-2329 or email office@revduprenovations.com to get started!
Recent Posts
- How Expert Home Renovation Contractors Can Help in Improving Your House’s Aesthetics?
- How Can a Roofing Contractor Protect Your Home From Harsh Weather?
- Bathroom Renovation vs Remodeling: Which One Is the Better Option?
- Expert Roof Leak Repair in Colorado Springs: For Flat and Shingle Housing Tops
- What Questions to Ask Before Hiring a Bathroom Renovation & Remodeling Contractor in Colorado Springs
- What Questions to Ask Before Hiring a Roofing Contractor in Colorado Springs
- How Remodeling Can Turn Your Bathroom Into A Space You Love?
- What Makes Professional Roof Repair Services Better Than DIYs? Let’s Find Out
- Why Hire a Kitchen Renovation Company in Colorado Springs for Your Next Upgrade
- What Can You Expect from Professional Roofing Services?
- How to Ace Flooring Installation: Step-by-Step Process and Expert Tips